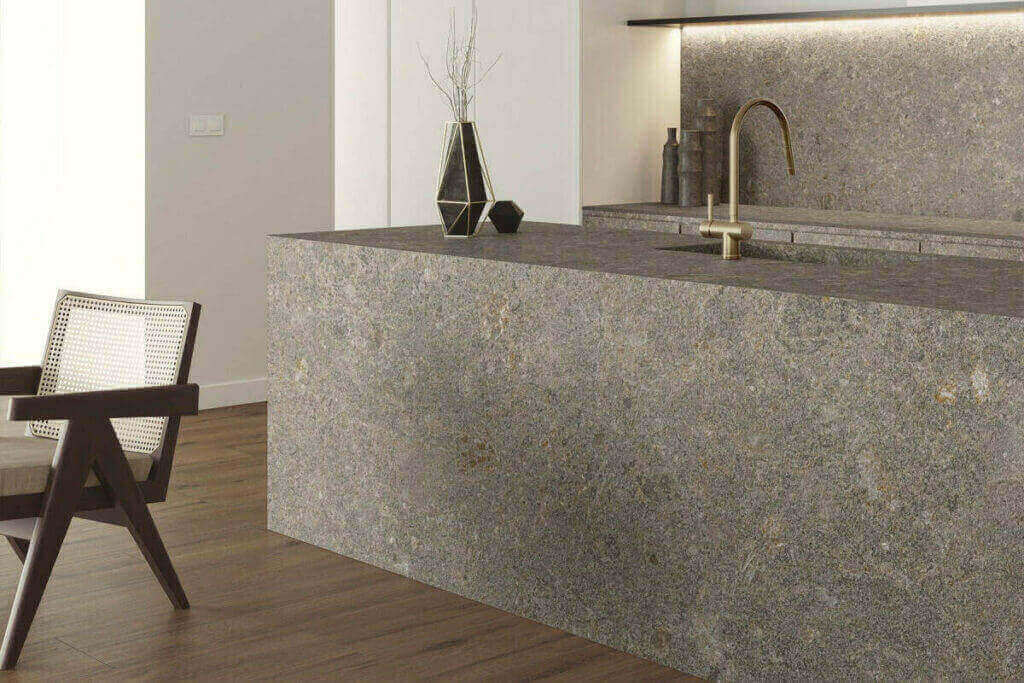
Are you interested in having a porcelain tile countertop in your home? If so, you’ve come to the right place. On average, homeowners pay $2,900 for tile installations for countertops. We are going to tell you how to DIY the installation, what you need, and tips to follow.
When it comes to upgrading your kitchen or bathroom, a porcelain tile countertop can add both aesthetic appeal and durability to your space. However, it requires careful planning and execution to ensure a beautiful and functional finished product.
In this article, we’ll provide you with a comprehensive guide. Keep reading so you can move forward with your home renovation project with confidence.


Plan and Measure
Before you buy any materials or start your project, you must sit down and plan it out. Take your time to come up with a detailed schedule and plan that will help you ensure the project goes as smoothly as possible.
We know starting a home renovation project can be exciting and you want to get started right away, but taking a step back and creating a plan will prove to be beneficial in the end.
During this beginning step, you’ll also want to take measurements of your kitchen. Be sure to account for any edges, corners, or irregularities.
An inaccurate measurement, even a small mistake, could cost you hundreds of dollars. Be sure to double-check your measurements more than once to ensure they are correct.
You’ll need to write down the layout, the tile size, and the location of any cuts or trim pieces. All of this information will help you estimate the number of tiles you need and will minimize any errors during the installation process.
Choose the Right Tiles
This step can be fun, as you’ll be able to get creative and create a look for your home that you love. Saying that, it’s important that you put a lot of thought into choosing the right porcelain tiles for your countertop installation.
There are a lot of different styles, colors, and textures to choose from. Once you’ve ordered the tiles, it can be costly if you change your mind.
You’re going to be spending a lot of time, energy, money, and other resources on this kitchen renovation, which means it’s vital that you choose the right tiles from the beginning.
Besides the aesthetic and style, you’ll also want to consider the features of different tiles. Some may have extra durability and chip resistance. Some may come with a matte finish and others won’t. There are benefits to both options, so be mindful.
Prepare the Surface
The next step when it comes to installing countertops is preparing the surface. You’ll need to ensure it’s clean, level, and structurally sound.
If there are any cracks or imperfections, be sure to repair them before you start the installation. Ignoring small issues could be detrimental later down the road.
You’ll want to apply a suitable backer board as well. This will provide a stable base for the tiles, so they look good and are sturdy.

Gather the Right Tools
We will talk more about the necessary tools for the project later. We do want to emphasize the importance of having high-quality tools.
While you don’t need the most expensive ones on the market, the better the tool, the easier it will be to use. For example, a tile cutter that is sharp and brand new will be much easier to use and will get the job done more efficiently than one that is old and dull.
Think of the tools that you purchase as an investment. You can use them later, on other home renovation or DIY projects.
Start with a Dry Layout
Before applying the adhesive, which we’ll talk about more next, you’ll want to lay out the tiles on the countertop. This will ensure the pattern fits well and that you like the overall look.
Doing a dry layout will allow you to make any changes and identify any potential issues before the tiles are permanently in place.
Apply Adhesive and Set Tiles
Applying the adhesive takes some patience and time. You don’t want to rush through this step. Make sure you apply it evenly and work in small sections.
This will prevent the adhesive from drying before you can place the tile down. You’ll need to do your research about which type of adhesive is best for porcelain tiles and countertops.
Once you have a layer of adhesive, you’ll place the tiles on it and press down firmly. Be sure to use tile spacers to maintain consistent spacing between each one.
You’ll also need to be cautious when placing the tiles to avoid messing up the adhesive or the pattern. The slower and more thoughtful you are during this step, the better your porcelain tile countertop will turn out.
Cut Tiles Precisely
There’s a high probability that you’ll have to cut a few tiles to fit them into corners or abnormally shaped edges. You’ll need to ensure the cuts are precise.
Having a few extra tiles in case you make a mistake is advised. You’ll use a wet saw to do this and you’ll need to wear the appropriate safety gear.
Grout Properly and Seal It
Once the tiles are set and the adhesive has dried, it’ll be time to apply the grout.
Be sure to consider the grout color before purchasing it. It will need to complement the tiles in your vision.
The grout will come up with instructions for mixing and applying. Don’t forget to wipe away the excess before it dries on the tiles. It’ll take some time for the grout to cure, but once it has, it’ll be time to seal it.
This is just to protect it from staining and moisture penetration. It will also help prolong the lifespan of your porcelain tile countertop.

Benefits of Porcelain Tile Countertop
The benefits of choosing porcelain tile for your kitchen countertops are endless.
One of the reasons so many homeowners invest in porcelain countertops is because of their durability and strength. They are resistant to scratches, which makes them ideal for high-traffic areas such as a kitchen. With proper care, the tiles will maintain their beauty and integrity for many years.
Another great thing about these kitchen tile countertops is that they are stain resistant. Spills happen all the time in the kitchen and you don’t want anything to stain the surface. With tile countertops, you won’t have to worry about that issue.
Porcelain tile countertops are also nonporous surfaces. This means they are less likely to become a home for bacteria, mold, and mildew.
The surface is easy to clean with mild soap and water. This is particularly important for kitchens where food preparation occurs.
Another great thing about having porcelain tiles in your kitchen is they can withstand high temperatures. You can place hot pots and pans directly on the surface without worrying about damage. This just shows how functional and convenient it can be to have this tile in your kitchen.
Installing porcelain tile countertops in your kitchen can also increase the value of your home. It’s an investment that you could profit from later if you decide to sell your home.
Required Tools
When you’re headed to the store to get the tools to install porcelain tile countertops, be sure to include this equipment on your list.
You’ll need a wet saw to cut the porcelain tiles and notched trowels to help spread the adhesive evenly. It’s important to have tile spacers and a level to ensure the project turns out perfectly.
Safety Precautions
While a tile DIY project is not super dangerous. It’s important that you protect yourself from potential hazards.
When you’re cutting tile, it’s important that you wear safety goggles. You don’t want any flying debris or dust to get in your eyes. Gloves can also be great to have on hand.
Porcelain and kitchen tile can be sharp, and you’ll have some tools that are dangerous for children. If you have anyone else or pets living in your home, be sure to take the necessary precautions to keep them safe.
From Slab to Style: Transforming Kitchens with Porcelain Tile Countertop
Installing your own porcelain tile countertop can be a very rewarding DIY project. However, as you can see, it does require a lot of careful planning, attention to detail, and the right tools. Using the information above in this guide will help you throughout the entire process.
Don’t wait to create the kitchen of your dreams. Start shopping now for the best tiling tools on the market.


Post a comment