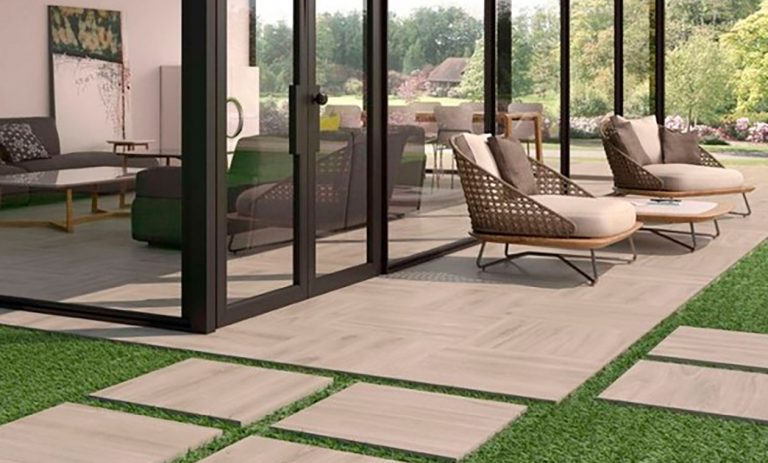
Upgrading your outdoor space with porcelain garden tiles is a brilliant way to transform its look and functionality. However, meticulous preparation is crucial for a successful tile installation, whether you’re creating a patio, pathway, or another outdoor feature.
Follow these step-by-step instructions to ensure your outdoor porcelain tiles are laid correctly and will last for years to come. Happy tiling!

Preparation: The Foundation for Success
Thorough preparation is crucial before laying your porcelain garden tiles. Here’s what you need to do:
Measure and Mark Out
Use a ruler or a measuring tape to correctly measure the width and length of the area where you plan to lay tiles. Break the area into smaller sections for irregular shapes and measure each part separately.
Use pegs or marking tools to outline the layout on the ground. Make sure the lines are clear and visible as they guide the excavation and tile-laying process.
Double-check your measurements and layout to ensure accuracy. Adjust the markings as needed to match your design vision.
Clear the Site
Remove any debris, vegetation, or old paving from the area. A clean surface ensures the tiles will adhere properly and prevent unevenness.
Ensure Proper Drainage
Check the site’s drainage. Ideally, the surface should slope away from buildings or areas where water shouldn’t collect. A slope of 1/4 inch per foot is generally recommended for proper drainage.
Consider installing drainage channels or French drains if the area naturally collects water or lacks an appropriate slope. These systems help divert water away from the tile installation area.
Create a Stable Base
Dig out the area to the necessary depth, taking into account the thickness of the tiles and necessary base layers. Lay a compacted crushed stone or gravel sub-base to provide a stable foundation.
Building a Solid Tile Foundation
Once the site is prepared, create a sturdy base for your outdoor porcelain tiles. Here are some tips to get you started:
When preparing a tile base (such as crushed stone or gravel), choose permeable materials. These allow water to pass through and reduce the risk of water pooling under the tiles.
Consider adding a layer of gravel or pea gravel underneath the tile base. This can further aid in drainage and provide a stable base for the tiles.
Layer of Sharp Sand or Mortar Mix
Spread a layer of mortar mix or sharp sand (builder’s sand) over the compacted sub-base. This layer helps to level the surface further and provide a base for the tiles.
Leveling and Compacting
Use a level and compactor to ensure the sand or mortar mix is evenly distributed and firmly compacted. A flat, smooth surface will prevent uneven tiles and ensure durability.
Laying Porcelain Garden Tiles
Now, it’s time to lay the tiles themselves. Start with the following:
Dry-Laying Tiles
Before applying adhesive, dry-lay the tiles on the prepared surface to plan the layout and make any necessary cuts. This step helps visualize the final look and ensures a precise installation.
Using Tile Spacers
Place tile spacers between tiles to maintain consistent gaps, which will later be filled with grout. This ensures uniformity in the appearance of your tiled surface.
Applying Outdoor Tile Adhesive
Apply a suitable outdoor tile adhesive with a notched trowel to a small section of the prepared surface. Work in manageable sections to prevent the adhesive from drying out.
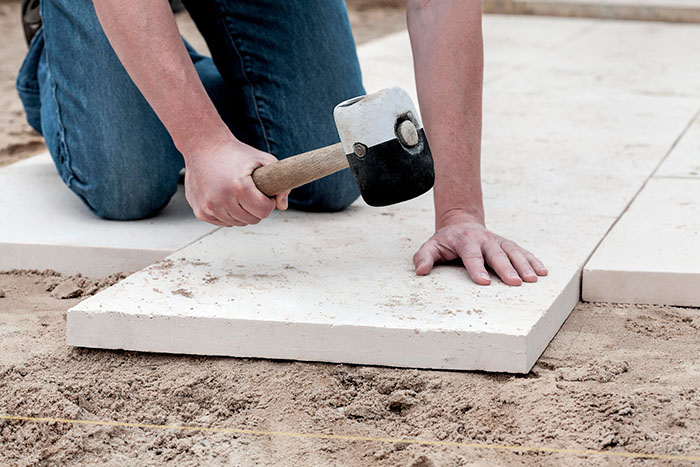
Back-Buttering Tiles
To enhance adhesion, apply a thin adhesive layer to the back of each tile (back-buttering) before placing it on the adhesive-covered surface. Press firmly to ensure complete contact.
Checking Alignment
Regularly use a level to check that tiles are aligned correctly and adjust as necessary. A slight adjustment during installation prevents issues later.

Grouting and Finishing Touches
Completing the installation with these final steps ensures a professional finish. Make sure you’re:
Grouting the Joints
Once the tiles are set and the adhesive has cured, apply grout to the joints. Use a grout suitable for outdoor use, resistant to weather and temperature variations.
Applying Grout Evenly
Spread grout evenly over the tile surface, ensuring all joints are filled. Tilt the grout float at a 45-degree angle to the tiles to push the grout into the joints effectively.
Cleaning Off Excess Grout
Before the grout sets completely, wipe away any extra grout from the tiles with a wet sponge. This prevents grout haze and makes cleaning easier.
Sealing the Grout
Apply a grout sealer for protection against moisture and stains, depending on your tiles and climate. Follow the manufacturer’s instructions for application methods and drying times.
Final Touches
Clean the tiles thoroughly once the grout is fully cured to reveal their natural beauty. Replace any tile spacers and inspect the installation for any touch-ups needed.
Additional Tips for Successful Tile Installation
To further enhance your porcelain garden tile installation, consider these expert tips:
Invest in porcelain tiles specifically designed for outdoor use. They are durable, weather-resistant, and offer a wide range of styles and finishes.
Leave small gaps between tiles, especially for large areas or where temperature fluctuations are common. These expansion joints allow tiles to expand and contract without cracking.
For complex designs or large projects, consulting with a professional tile installer ensures precision and durability. They have the tools and expertise to handle challenging installations.
After installation, maintain your porcelain garden tiles by regularly cleaning and sealing them again as needed. This preserves their appearance and extends their lifespan.
Mastering the Art of Laying Porcelain Garden Tiles
By following these steps and emphasizing proper preparation, you can successfully lay porcelain garden tiles in any outdoor space. Take your time during each stage to ensure a durable, attractive finish that enhances your home’s exterior aesthetics and functionality. Whether creating a patio, pathway, or another outdoor feature, using these methods will ensure the best outcome for your investment.
At RUBI, we evolve daily alongside professionals worldwide, supporting them with the tools they need to achieve exceptional results. If you are searching for ways to elevate your outdoor porcelain tile installation skills, take a look at our tiling products today.

Post a comment