Did you know that 57% of homeowners consider their home a work in progress. And 36% of Americans decided to DIY some aspect of their home for the purpose of improving their space? An attainable project you can tackle yourself is a tile installation in the kitchen or bathroom. One piece of equipment you can’t get by without is a tile cutter of some kind. Whether you’re working on your own projects or you’re a small construction business, manual cutters are a great way to save some money. With a manual cutter, you can enjoy the convenience that they offer, and get your job done right. Once you’ve figured out what style or design you want and how much tile you need, you’re ready to get started! Keep reading to learn how to cut tile without a wet saw and when it’s best to use a manual cutter.


Projects That Require Cutting Tile
Unless you get incredibly lucky with the dimensions of your project (pro-tip: don’t count on it!), you’re going to have to cut tile to fit properly into your space. It’s a necessary part of the tile installation process, but it doesn’t have to be intimidating.
Whether you’re updating your kitchen backsplash, installing a new bathroom floor or kitchen floor, or tiling the bathroom or shower walls, cutting tile with the proper equipment will ensure your project looks great.
Your particular project and types of tile will determine what equipment will help you get the job done, and there are different situations where certain tools will be better for you.
When You Should Use a Wet Saw
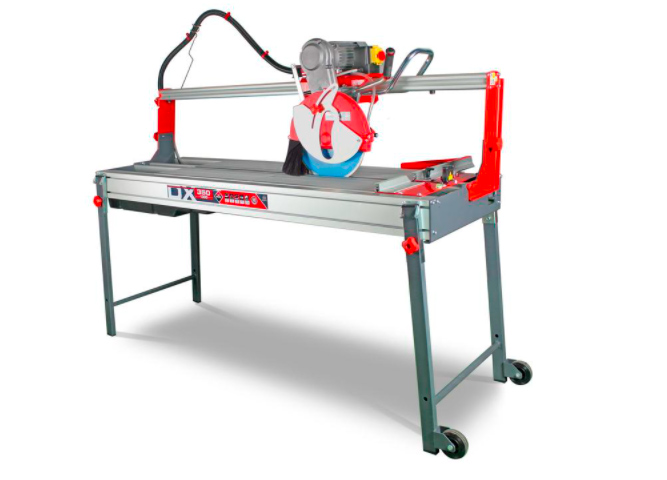
A wet saw is more heavy-duty and a bigger investment than a manual cutter, so it’s best suited to professionals or anyone who prefers to tackle all their own projects, no matter how big.
Whether it’s cutting through thicker, harder material or cutting rounded shapes and curved lines, a wet saw means business. If you’re using stone or thick ceramic tiles, you’ll definitely need to go with a wet saw.
However, all that functionality does have its drawbacks. A wet saw will be bigger and needs electricity, so the required setup of your workspace is more involved and will take more time. Some models don’t include reservoirs and need to be hooked up to a water source, which is less convenient and requires more setup.
You may find that you have to use the wet saw outside because of the water, bringing each piece you need to cut out and back into the work site as you go.

How Does a Wet Saw Work?
A wet saw is similar to a table saw, with a spinning diamond blade that slices through the tile. In addition, it will spray or trickle water over the area you’re cutting. This is intended to keep the dust down and also keep your saw and material from overheating as you cut.
Wet saws have a straight guide to keep your cuts perfectly even.
When You Can Use a Manual Cutter
Manual cutters are great for a different set of project requirements, and if you DIY frequently or do this work professionally, it’s perfectly reasonable to have both.

For DIY Projects
If you like to do-it-yourself and you’re just starting to learn about tiling, a manual cutter is probably the best place for you to start. It’s a much smaller investment, so it’s perfect for beginners.
Since you’re most likely starting out with smaller projects as well, a manual cutter will be plenty for you and is much more economical than splurging on more equipment than you need.
It’ll take you a little bit longer to get each piece of a tile lined up once you’re ready to start cutting, but it’s the perfect way to cut straight lines on softer pieces of tile. If your chosen material is something like porcelain or ceramic, a manual cutter will work great.
For Professionals
If you’re a professional or you plan to do a lot of different tiling projects yourself, it’s an important piece of equipment to have in your toolbox. Since it’s much smaller and lower-tech than a wet saw, it’s more portable, so you can bring it right where you need it. You might also find yourself in a situation where you don’t have access to water or electricity and a simpler manual cutter will do the trick for you.
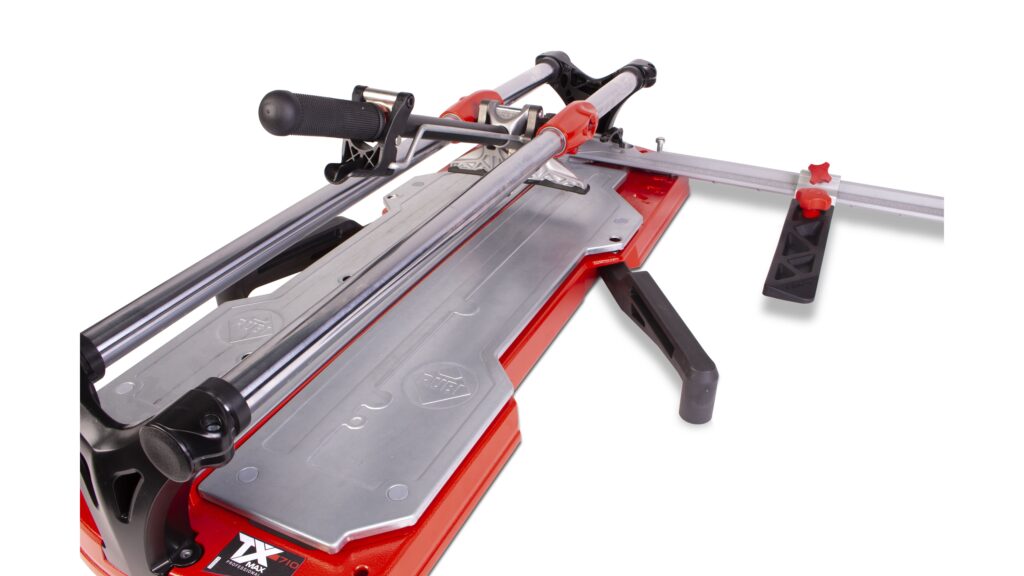
Manual cutters come in different sizes, so you can find something that suits your needs.
For really small cuts on thin pieces of tile or glass, you could potentially get away with using a scribe, carbide-tipped pencil, or even an angle grinder, but none of these will give you the ability to cut perfectly straight lines. It’s worth choosing a full manual cutter, so you don’t create more waste than you need to.
How Does a Manual Tile Cutter Work?
Unlike a wet saw, a manual tile cutter doesn’t require electricity or any other additional hookups.
A manual cutter features a handle attached to a rail and a small, wheel-shaped blade that slides across the tile and scores or etches a line into it along a perfectly straight line. This will weaken it along with your measurement, so you can break off the extra length by applying pressure to cut it to the size you need.

What You’ll Need to Get Started
- Your tile of choice
- Measurements of your floor plan
- Manual tile cutter
- A pencil to mark your measurements
- A tile file
- Safety goggles
- Gloves
- A clean, flat, stable work surface
How To Cut Tile Without a Wet Saw
First, take a measurement to determine what size you need to cut your tile down to. Mark each piece with a pencil or chalk along the line where you’ll be cutting. It’s best to cut the first one and make sure everything lines up before moving on to the remaining pieces. This way you can make any necessary adjustments.
With your tile cutter on a flat, stable surface, position your first piece of tile into the cutter and line up the handle with your marked line.
Practice Makes Perfect
Press down firmly, but not too hard; this may take a bit of practice, so you know how much pressure is the right amount for your specific tile cutter and tile material. Don’t be afraid to try it out on a few pieces first. Applying even pressure, push the handle along the measurement you marked out.
Once you’ve scored your tile, press on the break so that it applies pressure on either side of the scored line until it snaps. Line your cut piece up to where it will be installed to double-check that you measured correctly before you finish the first piece, just in case you need to re-do it.
Smooth out the cut edge with your file or a rubbing stone to get rid of any roughness or uneven surfaces.
Your tile is ready to install!
Tipe and Tricks
Safety equipment is important! No matter what project you’re working on or what method you use to cut tile, you’re working with sharp tools and pieces, and it will create dust. Don’t forget to protect your eyes and hands, and proper ventilation is always a good idea.
Take your time! Rushing will only create wasted material, so go slow and double-check your work and measurements.
Be sure to account for grout lines when you take your measurements, as you’ll need to grout around each piece entirely.
It can be helpful to have a pair of tile nippers on hand. They’re best for making small irregular cuts and are inexpensive. Be aware that they don’t cut as cleanly, so you’ll definitely need to do a bit of sanding.
It’s not uncommon to break pieces of tile using a manual cutter, so make sure you have enough to practice on and to account for waste.
Jump Into Your Project
Adding or updating tile is a great way to make your space more beautiful and valuable, and it’s a project you can take on yourself. As long as you have the right equipment, you can learn how to cut tile without a wet saw and get amazing results.
If you need some inspiration before you get your project started, let us help!


Post a comment