
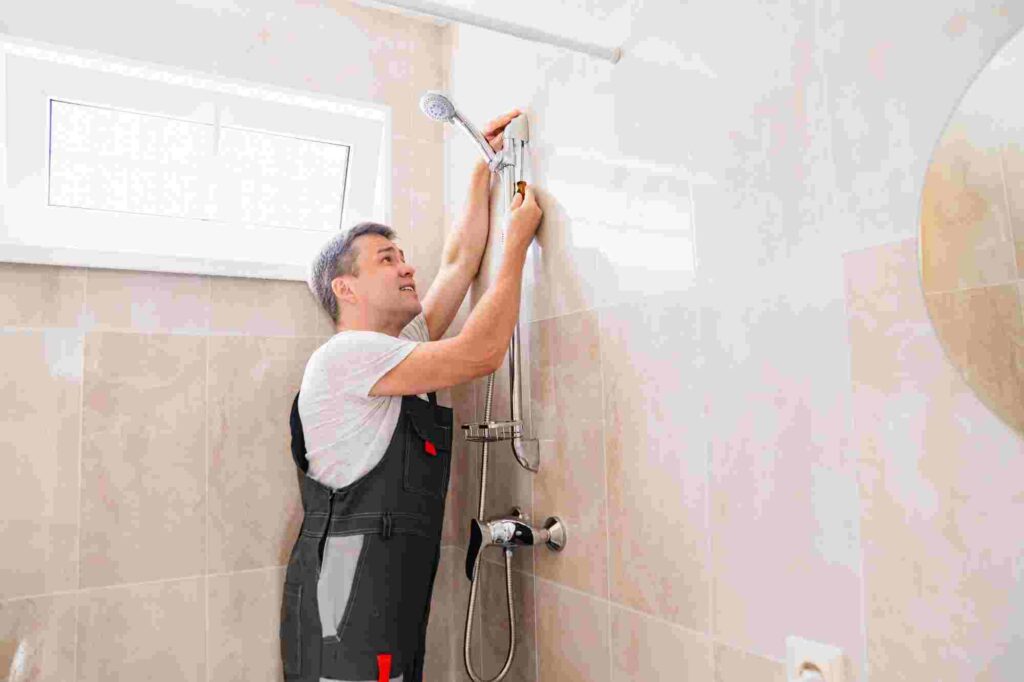
Cutting a Hole for Shower Head in Tile: A Step-by-Step Guide
Cutting a hole for a shower head can be an intimidating project, but a new shower head can take your bathroom experience to the next level. However, if you crack the tiles around it…cutting a hole for a shower head in tile can be a headache and not nearly as fun. Improper tile cutting during shower installations can lead to costly repairs and damaged materials. Many DIY enthusiasts and professionals face challenges when working with delicate tile materials. Today we’re taking a closer look into the tools, techniques, and precautions needed for successfully cutting a hole for a shower head in tile.

Tile Materials and Their Challenges
When cutting a hole for a shower head in tile, the type of tile material you’re working with matters a lot. Different materials have unique properties that influence how they respond to tools and techniques. Understanding these differences can save time and prevent costly mistakes.
There are three primary types of tiles commonly used in shower tile installation:
- Ceramic tiles
- Porcelain tiles
- Natural stone tiles
Cutting a hole in Ceramic Tiles
Ceramic tiles are one of the most popular choices for showers due to their affordability and ease of installation. However, they can crack under too much pressure. Using masking tape over the drilling area and applying gentle pressure can help.
Porcelain Tiles
Porcelain tiles are tougher than ceramic. While this durability makes them a great long-term option, it also means that standard tools won’t work. A diamond-tipped hole saw is the best tool for drilling through porcelain without damaging it.
Natural Stone Tiles
Natural stone adds a luxurious feel to any shower but requires extra attention. Its irregular surface and high density demand slower drilling speeds. Cooling the drill bit with water during the process can prevent overheating and cracking.
Hole in Tile
When preparing to cut a hole for a shower head in tile, having the right tools is essential to ensure a clean, precise result. The tools you use will determine how smoothly the process goes and help avoid cracking or damaging the tile.
A diamond-tipped hole saw is one of the most reliable tools for cutting through tile. Its durability and precision make it suitable for harder materials like porcelain and natural stone.
A drill with variable speed settings is also necessary, as slower speeds are better for delicate tile work. Masking tape is another important item. Applying tape to the drilling area can help prevent the drill from slipping.
Water is a key element for keeping the drill bit cool and reducing friction during the process. A spray bottle or a small container can work well for this. Safety equipment, including goggles and gloves, is also important to protect yourself from debris and sharp edges.
Preparing the Tile for Drilling
Proper preparation is one of the most important steps when cutting a hole for a shower head in tile. It helps you avoid mistakes and ensures the process goes smoothly.
Begin by measuring and marking the exact spot where the shower head hole will go. Accuracy is key here, as even small misalignments can cause problems during installation.
Using a pencil or marker, draw a clear guide for the drilling area. Applying masking tape over this spot can provide extra grip for the drill bit and prevent it from slipping.
Securing the Tile
Once the tile is marked, make sure it is secured in place. If the tile is not already installed on the wall, position it on a stable surface.
A soft cloth or padding underneath can help prevent scratches. The stability will keep the tile from moving and reduce the risk of cracks.

Step-by-Step Guide to Cutting a Hole for a Shower Head in Tile
Start by drilling a pilot hole in the center of the marked area on the tile. This small hole will serve as a guide for the diamond-tipped hole saw.
Use a tile drill bit for this step, applying gentle pressure and working at a slow speed to avoid cracking or chipping the tile. Once the pilot hole is complete, you’re ready to use the hole saw.
Attach the diamond-tipped hole saw to your drill and position it over the pilot hole. Begin drilling at a slow, steady pace.
Keep the tool level to avoid creating an uneven cut. As you work, apply water to the area to keep the drill bit cool.
Overheating can cause damage to both the tile and the tool. A spray bottle works well for this, allowing you to control the amount of water applied.
Continue drilling, pausing occasionally to check your progress. It helps you avoid mistakes and ensures the hole stays clean and accurate.
Once the hole saw cuts through the tile, remove the tool carefully to prevent rough edges. Inspect the finished hole and use sandpaper or a file to smooth out any imperfections.
Post-Cutting Tile Care and Installation Tips
After the hole is cut, inspect the edges for rough spots or chips. Imperfections can make installation difficult or lead to leaks around the shower head.
Use fine-grit sandpaper or a tile file to smooth the edges of the hole. Work gently and evenly to avoid creating new cracks or damage to the tile surface.
Next, clean the tile to remove dust and debris from the cutting process. A clean surface allows for better adhesion if the tile needs to be installed on the wall. If the tile is already in place, cleaning ensures a tight fit between the shower head and the opening.
Finally, align the hole with the plumbing for the shower head. Ensure that the opening matches the pipe placement precisely.
The hole should be snug around the pipe but not so tight that it puts pressure on the tile. Once everything is aligned, secure the shower head and check for any gaps that might require sealing.
Drilling Holes in Tile Tips
Cutting a hole for a shower head in tile requires the right tools, preparation, and careful execution.
At RUBI, we prioritize quality, efficiency, and creativity throughout every stage of tile installation. Our tool range is designed with clear, intuitive solutions to help professionals choose the right equipment. In over 120 countries, our portfolio reflects customer feedback, delivering tools that align with real-world needs and ensure exceptional results.
Get in touch today to find out how we can help with your tiling needs!
Post a comment