Imagine stepping into a space where every inch of the floor tells a story, a space that reflects both timeless beauty and enduring strength. This is the promise of a cement tile.
Cement tiles are a choice that brings life to indoor and outdoor areas alike. With the potential to last over a century, these tiles are a legacy and offer an unmatched blend of durability and aesthetic appeal. Yet, the secret to unlocking this enduring beauty lies in the mastery of tile installation and care.
Join us as we explore the essential steps to achieving a flawless finish with cement tiles, transforming ordinary spaces into timeless masterpieces.

The Versatile Charm of Cement Tiles
You’ve just decided to enhance your home with cement tiles. Known for their vibrant colors and intricate patterns, these tiles promise to transform any space.
Yet, the real magic of cement tiles goes beyond their initial allure. Unlike other materials, they hold their beauty indoors and brave the elements outdoors, all while aging gracefully over the years.
Inside Out, Upside Down
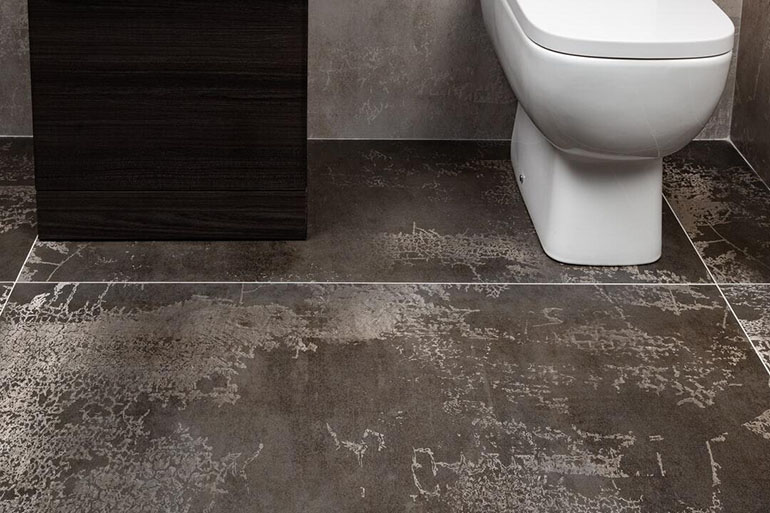
Cement tiles adapt effortlessly to every corner of your home and marry durability with design.
Patios, walkways, and even outdoor kitchens come alive with the depth and durability of cement tiles. They stand firm against:
- Rain
- Sun
- Foot traffic
Cement tiles make your outdoor living spaces as welcoming and stylish as those inside.
The Foundations of Cement Tile Installation
The foundation, quite literally, sets the stage for a successful installation. Let’s dive into the critical steps of preparing the substrate and laying the groundwork.
Preparing the Substrate: A Clean Slate
The journey to a flawless cement tile installation begins with the substrate, which is the surface upon which the tiles will be laid.
A clean, level, and stable substrate is crucial. This ensures your tiles lie flat and remain intact over time, without cracks or movement.
Clean and Clear
Start by removing any debris, dust, or existing flooring materials. A pristine surface ensures better adhesion for the tiles.
For the best results, use a vacuum to capture any lingering particles.
Level Matters
Next, check the level of your surface. Even the slightest slope or bump can throw off your tile layout.
Use a long level to identify any inconsistencies. You can sand down high spots and fill in low ones with a leveling compound to achieve a perfectly flat surface.
Stability Is Key
Ensure your substrate is firm and won’t shift over time. If you’re working on a surface that’s prone to movement, consider reinforcing it before proceeding.
Stability is essential for preventing cracks and other damage to your cement tiles.

Selecting the Right Adhesive or Mortar
The bond between your tiles and the substrate is as important as the tiles themselves. The right adhesive or mortar varies based on the type of substrate you’re working with.
Typically, these are the types of substrates you may find:
- Concrete substrates
- Wooden substrates
- Existing tiles
- Non-porous surfaces
For concrete surfaces, a thin-set mortar is generally recommended for its strong bond and versatility. However, when working with a wooden substrate, use a flexible adhesive designed to accommodate the natural movement of wood floors.
Finally, if you already have an existing tile floor or wall, you might choose to lay a new tile without removing the original tiles. In this case, choose an adhesive with a strong bonding agent to ensure the new tiles adhere well to the slick surface. This also works well for other non-porous surfaces.
Laying the Groundwork: How to Lay Tiles
Begin by dry-laying your tiles, starting from the center of the room and working your way out. This allows you to adjust the layout for a balanced look.
Prepare your adhesive or mortar following the manufacturer’s instructions. Achieving the right consistency is key to a strong bond.
Use a notched trowel to spread the mortar on the substrate, working in small sections to prevent it from drying out. The notches create an even layer for the tiles to rest on.
Lay your tiles into the mortar, gently pressing each one down and giving it a slight twist to secure it in place. Use tile spacers to maintain uniform gaps between tiles, crucial for a neat grouting process later.
Regularly use a spirit level to ensure tiles are flat and even across their surface. Adjust as necessary before the mortar sets.
The Art of Tile Cutting and Shaped Tiles
Transforming a collection of cement tiles into a stunning layout often requires more than just laying them down. Tiles need to be cut and shaped to fit perfectly around the unique features of your space, from corners to obstacles.
Mastering this art is essential for achieving a polished look.
The Right Tile Cutting Tools for the Job
Cutting cement tiles requires precision and the right equipment. Tile saws, wet saws, and angle grinders equipped with diamond blades are among the most effective tools for this task.
Tile saws are ideal for making straight cuts. They are a go-to for many installers. They provide clean, precise cuts, and they are perfect for trimming tiles to size.
When water is involved, the cutting process becomes smoother, reducing dust and cooling the blade. Wet saws are excellent for detailed work, including intricate cuts or notches.
For shaping tiles or making curved cuts, angle grinders are incredibly versatile. The diamond blade cuts through cement tiles with precision. With these tools, you can create custom shapes and sizes.

Techniques for a Perfect Fit
Always double-check your measurements before cutting. A slight error can result in a tile that doesn’t fit, wasting materials and time.
Use a pencil to outline where you need to cut. This visual guide helps ensure accuracy during the cutting process.
If you’re new to using a particular tool, practice on a few spare tiles first. Getting a feel for the tool’s handling and the tile’s response can make a significant difference in the outcome.
Minimizing Chipping and Breakage
Cement tiles, while durable, can chip or break if not handled correctly during cutting.
A diamond blade designed for cement tiles is essential. These blades provide a smoother cut and reduce the chances of chipping.
Set the blade to cut just slightly deeper than the tile’s thickness. This prevents unnecessary wear on the blade and tile.
A steady, controlled pace is crucial. Rushing can lead to mistakes and uneven cuts, while too slow a speed can increase friction and the potential for chipping.
How to Apply Tile Grout and Sealant
After laying your cement tiles with precision, the next pivotal step is grouting.
Grout fills the gaps between tiles, locking them in place, and adds the finishing touch that can either make or break the look of your project. Achieving a clean, consistent finish with your tile grout requires attention to detail and the right approach.
Mixing and Applying Grout With Precision
The journey to a flawless grout application starts with the mix. Whether you’re using sanded or unsanded grout depends on the width of your tile gaps and the specific look you’re aiming for.
The grout should have a paste-like consistency, not too thick and not too runny, similar to peanut butter. This consistency ensures it presses into the gaps easily, filling them completely without sagging or running.
Prepare the Grout
Following the manufacturer’s instructions, mix your grout to achieve the right consistency. Let it sit for a few minutes after mixing to allow any air bubbles to escape, which can affect the solidity and appearance of your grout lines.
Application
Using a rubber float, apply the grout at a 45-degree angle, pressing it firmly into the spaces between the tiles. Work in small sections to maintain control over the uniformity of the application.
The angle and pressure help push the grout fully into each gap. It helps to make sure that there are no air pockets or voids.
Smoothing the Lines
As you apply the grout, use the edge of your float to smooth out the lines and remove any excess grout from the tile surface as you go. This step will make your work look clear, clean, and professional.
Uniform Grout Lines and Color
Maintain a consistent pressure and angle as you apply grout to each section. The consistency helps prevent variations in grout line width and depth.
Mix enough grout to complete your project in one go, if possible. If you must mix multiple batches, make sure they are proportioned exactly the same to avoid color discrepancies.
Using a grout maximizer instead of water can enhance color consistency and reduce the chance of efflorescence.
Cement Tiles and the Path to Timeless Beauty
Mastering the art of working with a cement tile transforms spaces into timeless masterpieces. Each step is crucial for achieving a stunning and durable finish.
At Rubi, we understand the importance of perfection in every aspect of tile installation. We work closely with professionals worldwide and we pride ourselves in equipping them with tools designed for the highest performance and best results.
Explore our range of products and discover how Rubi can enhance your next tile project.

Post a comment