The best tile cut for minimum grout for a clean, modern look can be achieved easily if you know what is needed. Did you know, the Grand View Research, projects that the U.S. ceramic tiles market will grow at a CAGR of 7.0% by 2030? As the demand for high-quality ceramic tiles increases, homeowners like you may strive to balance functionality and aesthetics.
A crucial element in achieving this balance is minimizing grout lines. With the right tile cuts and cutting techniques, you can significantly reduce grout visibility for a cleaner, more seamless look.
But how do you achieve the best tile cut for minimum grout and achieve a clean, modern look? In this article, we’ll explore the cutting techniques and tile cuts that will help you minimize grout lines while ensuring a sleek, modern finish for your space.

Selecting the Right Tools for the Job
To achieve the best tile cut for minimum grout, using the proper tools is crucial to improve your precision and prevent tile damage
Diamond Tipped Hole Saws
Diamond Tipped Hole Saws These tools, such as RUBI’s premium hole saws, are ideal for cutting clean holes in various tile types, including ceramics and porcelain. As a result, you can create precise holes and ensure the best tile cut for minimum grout, helping maintain a seamless finish.
Tile Nippers
Tile nippers are perfect for making small, intricate cuts. They allow you to nibble at the edges of tiles for a precise fit, which is especially useful when working with complex tile layouts or irregular shapes. This tool helps you achieve minimal grout lines, contributing to a clean, modern aesthetic
Rotary Tools
Additionally, rotary tools are versatile and come with a variety of accessories, allowing you to work on different types of tiles. They are ideal for detailed cutting and shaping. For example, rotary tools work well for creating holes or notches in tiles. Consider using a diamond-coated bit for the best results on hard tiles.
Wet Saws with Diamond Blades
Wet saws equipped with diamond blades are ideal for straight cuts, especially on hard materials like porcelain. These saws help ensure clean, precise cuts while minimizing the risk of cracking, so you can achieve the best tile cut for minimum grout lines, especially when working with large-format tiles.
Measuring and Marking the Tile
Before you start cutting, ensure to take accurate measurements. Accurate measurements are key to achieving the best tile cut for minimum grout and ensuring your tiles fit perfectly. When cutting a hole for the shower head in the tile, ensure the hole aligns perfectly with the fittings. A minor mistake can lead to misalignment that can affect the functionality of your installation and the overall clean, modern look.
A minor mistake can lead to misalignment that can affect the functionality of your installation. To accurately measure the area where the hole needs to be, you should:
- Use a ruler or a measuring tape for precise measurement
- Measure the diameter and the location of the hole
- Factor in the space needed for pipe sleeves or other fittings
- Ensure the hole is large enough
- Avoid making the hole too large to prevent gaps
After taking the measurement, use a grease pencil or marker to outline the cutting area. These marking tools will help you make precise lines that won’t smudge. Double-check the measurements before cutting the tiles to avoid mistakes.
Cutting Techniques for a Precise Fit
Once you have marked the tile, it’s time to cut. The key to achieving a clean, modern look with minimal grout lines is using the right cutting technique. Here are a few steps that can help you achieve a precise fit.
Start With a Pilot Hole
Begin by drilling a small pilot hole in the center of the marked area. From there, gradually increase the size. This will prevent the tiles from chipping or cracking.
The pilot hole can also make it easier for you to control the cutting tool as you work. Avoid rushing this step or using too much force, as the tiles can crack. Instead, work gradually and allow the tool to do the work.
Control Tool Speed and Pressure
To ensure a clean cut, use the tool at a slow, controlled speed. Most of the cutting tools come with adjustable speed settings. This allows you to adjust the speed accordingly, especially when working with brittle tiles.
Gradually increase the speed if you need to cut through thicker tiles. Apply even and light pressure throughout the process for consistent results. Ensure the tiles are securely held in place while cutting to prevent any movement.

Use Water for Cooling
Cutting tools such as diamond-tipped hole saws can become very hot during use. If you don’t control the heat, the tiles may crack or get damaged. To prevent overheating, use water to cool the cutting surfaces.
You can also use a wet saw – it’s designed to apply water directly to the blade during cutting. Always ensure a consistent flow of water throughout the cutting process for optimal results.
Finishing and Installing the Tile
After cutting rectified tiles, it’s important you smooth the edges to ensure they are safe to handle. Sharp or rough edges can also make the installation process difficult, and affect the clean, modern look you’re striving for.
Installing the Cut Tile
When installing the tile, aim to align it perfectly with the pipe. Ensure there are no gaps or misalignments, as they can lead to uneven grout line widths. Use tile adhesive or mortar to secure the tile in place.
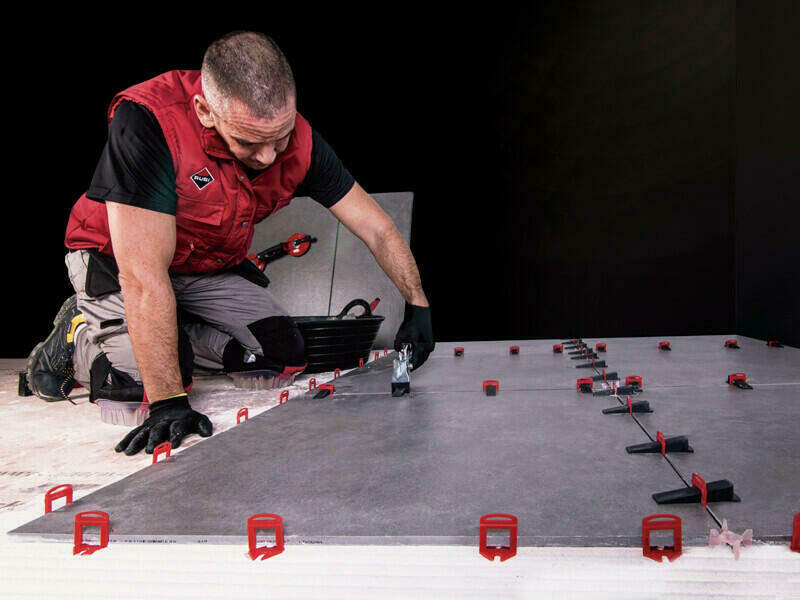
Press the tiles firmly together to ensure a solid bond. Consider using a tile spacer to maintain uniform spacing between the tiles. Also, check alignment regularly to ensure the tiles stay straight and level.
Maintaining the Finish
Once the tile is securely in place, allow the adhesive to set. Most manufacturers always indicate the time needed for the adhesive to work. Then, proceed to fill the small gaps between the tiles with grout.
To maintain that sleek, modern aesthetic, use minimal grout. A grout float can help you evenly spread and clean off excess grout before it dries. Tips for a clean, modern look include using the right cutting methods and tools to minimize grout lines.
Get the Best Tile Cut for Minimum Grout Today
With the right tools and techniques, you can create the best tile cut for minimal grout. This will give your tiles a seamless, professional-looking appearance. Well-cut tiles with seamless finishes are also easier to install and maintain. Tips for a clean, modern look include using the right cutting methods and tools to minimize grout lines.
Achieving a sleek, seamless tile finish doesn’t have to be challenging. With RUBI’s cutting-edge tools and expert techniques, you can create the perfect tile cuts with minimal grout. Our products will help you reach professional results while simplifying your tile maintenance.
Get in touch with us today to find the right tools for your next project.

Post a comment