When it comes to cutting straight lines in tile, when using proper tools such as a manual cutter or electric tile saw with a good quality diamond blade, the result is incredibly easy to master! But when it comes to asking about cutting curves, specifically how to cut tile around a toilet, this can be a lot more difficult.


SHOULD I REMOVE THE TOILET?
Many tiling professionals can tell you of the difficulties and headaches that come with trying to cut corners by tiling around a toilet without first removing it. By not removing the toilet before you begin to tile, you will end up creating more work to do when you’ll need to make more curved cuts to fit around the toilet base. You will also have less room to work with while tiling, if you don’t remove the toilet and will find it gets your way.
Tiling exactly round a toilet base also means you will need to use silicone caulk or grout where the tile meets the base of the toilet. Although this will help to give a seamless transition look, it can cause further problems down the road.
At times toilet seals will need to be replaced. This will become more of a hassle if they toilet based has had silicone caulk or grout used around the base. Another key factor to consider is, if you ever need or plan to replace your toilet in the future, you will need to find the same toilet to replace. This is because the base of toilets can differ greatly in their shape and size.
If you cut your tiles around the base of the toilet, you are only making cuts for one style of toilet, meaning when it comes to replacing your toilet, the new toilet might not match the base and therefore the shape of the tiles of your previous toilet.
CUTTING TILE AROUND A TOILET FLANGE
Once you’ve removed the toilet, you want to tile around the toilet flange. This will allow you to lay any toilet base over the tile afterwards for a seamless & cleaner finish. Before you begin this however, draw out your grid and dry lay the tile to confirm your plans. Then wet lay your tiles, except for where you’ll need to make cuts for the flange.
Once your laid tile has completely dried, you can begin making your cuts around the flange. Make sure to wait for all the tile in the bathroom to fully dry before you begin, or you will risk damaging level of the tiles and your work.
TRACING THE FLANGE FOR YOUR TILE CUTS

A commonly recommended way to trace around your flange, is usually using some construction paper or cardboard to trace around the edge before making the cut on your tile.
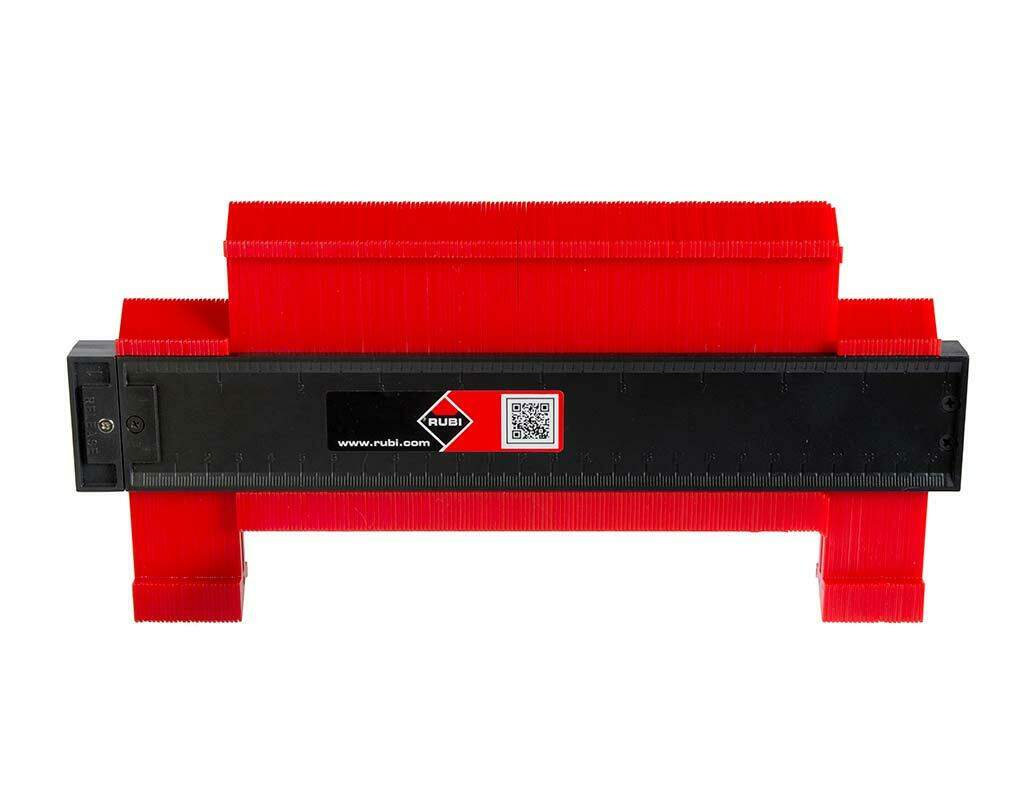
To get the most precise outline however, we recommend using a RUBI shape template to trace around the flange. The RUBI shape is a tool that allows you to copy the shape of the area that can often be difficult or awkward to mark onto tiles for cutting. The shape template will help you to trace the circular shape of the flange with ease.
If you require multiple tiles to fit around the flange and toilet, use the shape template, to help you trace & cut multiple tiles to fit around the flange.

MAKING YOUR CUTS
Once you’ve set your shape & made the correct markings on your tiles surrounding the toilet flange, it’s now time to think about the best way to make the cuts.
There are two techniques, we recommend when thinking about how to cut tile around a toilet. One way to cut the curves, is to use an angle grinder with an ECD blade. The other option is to use a RUBI DRYGRES Diamond Drill Bit correct size drill bit to drill into the tile and create a neat hole to lay around the flange.
USING A DIAMOND DRILL BIT
DRYGRES diamond drill bits are designed to be used exclusively with electric drills. The drill bits contain wax inside them, which melts while using the drill bit and facilitates cooling and the evacuation of drilling remains. The diamond particles enable you to drill all types of tile, from ceramic to porcelain and other wall materials such as marble and granite.
One of the most important things you need to keep in mind is that drilling through tile, is a task that requires a lot of patience. To achieve the best finish while also helping your drill bits last longer, its important to take your time and drill using a suitable rotation speed so the drill doesn’t overheat while also performing a slight orbital movement when drilling.
It’s also important to apply a light but consistent but light pressure when drilling. This will help you to drill through the tile while reducing the risk of cracking it.
To help your drill bits perform as long as possible, you must make sure when finishing each hole, you must remove the core of the material just drilled from the drill bit. If you don’t remove this core after each hole is drilled, you will run the risk of burning the drill bit due to lack of ventilation and cooling by the wax.
USING AN ANGLE GRINDER
Another simple way of making your cut is to use an angle grinder. An angle grinder is a versatile tool, that will allow you to make quick and precise cuts. It’s important to note that grinders generate a lot of dust when in use. We recommend wearing a protective face mask and safety goggles when using a grinding tool to help reduce the risk of any dust getting in your eyes or mouth.
Firstly before you begin, make sure that you are using the right type of blade for these cuts. The right blade for cutting holes in tile will make a big difference. We recommend using the RUBI ECD diamond blade.
The ECD blade is diamond encrusted on both sides, allowing you to make cuts at a higher speed and from both sides easily. Using an electroplated diamond blade also helps to reduce vibrations when dry cutting with a grinder, making it the ideal tool to use with materials with a risker risk of breakage.
With your traced tile laying flat, on the first pass, lightly score the traced circle with your blade at a 45° angle to the tile, making sure to not cut too deep. Continue to grind around the circle until you’ve made your cut throughout the traced line and removed the tile in the middle.
DRY FITTING YOUR CUT PIECES
Whether you’ve used an angle grinder or a drill bit to cut your hole, now is the moment of truth. Dry lay your newly cut piece(s) of tile to make sure they fit around or under your flange.
Remember, you will also be installing your toilet base, covering over the cut once you’ve laid your tiles. If you have made too big of a cut and your toilet base won’t cover the hole, start again until you achieve the right cut.
IF YOU CAN’T REMOVE THE TOILET
Depending on how the toilet was previously installed or for whatever reason, there may be a situation when removing the toilet before installing tile is impossible. In this scenario, you can still lay your tile around the toilet. The steps are very similar to what we’ve already covered, the main difference is, instead of tracing around the shape of the flange, you’ll need to trace around the base of the toilet.
For this, you will repeat the previous step of using the RUBI shape-template. Trace around the dimensions of the toilet, apply this to the tile and make your cuts to remove this from the tile. Remember to make sure you leave enough spacing in between each tile & the base for your grout lines.
And that’s everything you need, to know on how to cut tile around a toilet!


Post a comment