
Anhydrite screed has become increasingly popular in construction due to its excellent self-levelling properties and ability to provide a smooth, even surface for tiling. However, proper preparation and tiling techniques are crucial to ensure the longevity and durability of the tiled surface. In this guide, we’ll take you through the step-by-step process of preparing an anhydrite screed for tiling and how to tile on it.

Understanding Anhydrite Screed
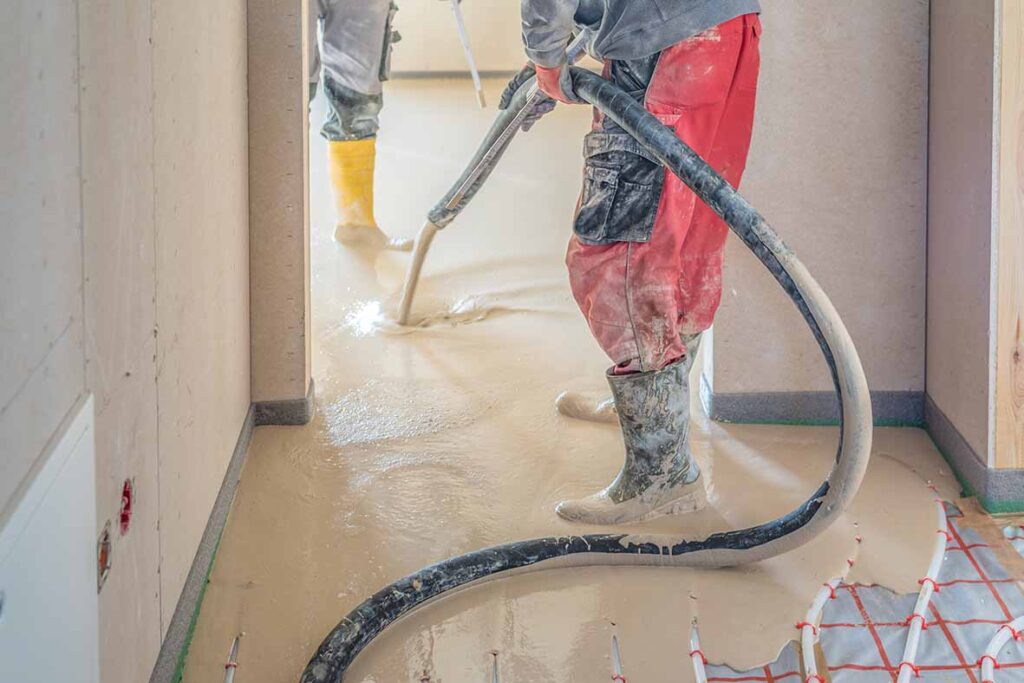
Anhydrite screed, also known as calcium sulphate screed, is a type of self-levelling compound. It is used to create a smooth and level surface for floor finishes such as tiles. It consists of calcium sulphate hemihydrate, water, and aggregates. Unlike traditional sand and cement screeds, anhydrite screeds offer faster drying times and superior flow characteristics, making them ideal for modern construction projects.
Preparing the Surface
1. Surface Inspection: Before tiling, inspect the anhydrite screed surface for any cracks, voids, or uneven areas. Address any issues by filling cracks with a suitable repair mortar and levelling uneven areas with a self-levelling compound.
2. Surface Cleaning: Thoroughly clean the surface of the anhydrite screed to remove any dust, dirt, or debris. A clean surface ensures proper adhesion of the tile adhesive and prevents any contaminants from affecting the bond.
3. Priming: Apply a suitable primer to the surface of the anhydrite screed. The primer helps to improve adhesion, reduces porosity, and minimizes the risk of moisture absorption from the tile adhesive.
4. Moisture Testing: Conduct a moisture test to determine the moisture content of the anhydrite screed. Excessive moisture can lead to adhesive failure and tile delamination. Use a reliable moisture meter to ensure that the moisture content is within acceptable limits for tiling.
5. Moisture Barriers: If the moisture content of the anhydrite screed is too high, install a moisture barrier to prevent moisture migration into the tile adhesive. This can be achieved by applying a liquid DPM (damp proof membrane) or a suitable waterproofing membrane.

Tiling
1. Selecting the Right Tile Adhesive: Choose a flexible tile adhesive suitable for use on anhydrite screeds. Look for adhesives specifically formulated for use on calcium sulphate substrates, as they provide excellent adhesion and flexibility.
2. Mixing the Adhesive: Follow the manufacturer’s instructions for mixing the tile adhesive. Use clean water and mix the adhesive to the correct consistency to ensure proper adhesion and workability. We have a full range of mixers available, find the best one for you here.
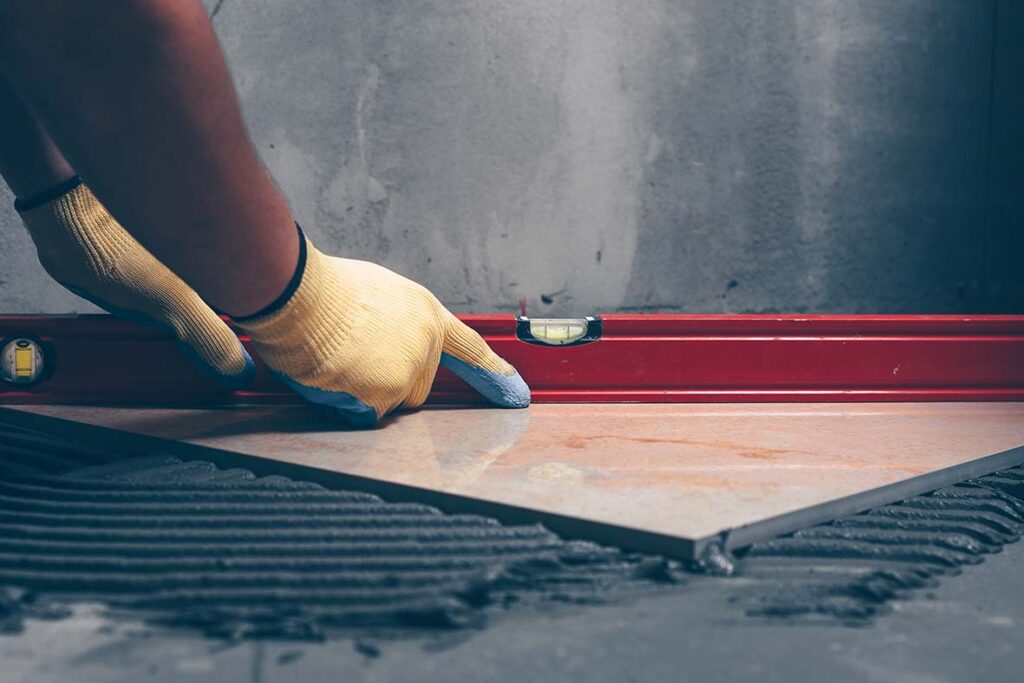
3. Applying the Adhesive: Use a suitable trowel to apply the tile adhesive to the prepared anhydrite screed surface. Spread the adhesive evenly, covering the entire area where tiles will be installed. Work in small sections to prevent the adhesive from drying out before laying the tiles.
4. Laying the Tiles: Carefully place the tiles onto the adhesive, pressing them firmly into place. Use tile spacers to maintain consistent spacing between tiles and ensure straight grout lines. Check the level of the tiles regularly to ensure a flat, even surface.
After Tiling
5. Grouting: Once the adhesive has cured and the tiles are firmly set, remove the tile spacers, and grout the joints between the tiles. Choose a suitable grout colour and mix it according to the manufacturer’s instructions. Apply the grout using a grout float, pressing it into the joints and smoothing it over the surface of the tiles.
6. Cleaning: After grouting, clean any excess grout from the surface of the tiles using a damp sponge. Rinse the sponge regularly to prevent grout haze from forming on the tiles. Allow the grout to cure fully before walking on or sealing the tiled surface.
7. Sealing: Depending on the type of tiles used and the desired finish, consider applying a suitable sealer to protect the tiled surface from stains, moisture, and dirt. Follow the manufacturer’s recommendations for application and maintenance to ensure long-lasting results.
Mastering Anhydrite Screed
Mastering the preparation and tiling process on anhydrite screed requires careful attention to detail and adherence to best practices. By following the steps outlined in this guide, you can achieve a flawless tiled surface that not only looks stunning but also stands the test of time. Whether you’re a DIY enthusiast or a professional tradesperson, proper preparation and tiling techniques are essential for success when working with anhydrite screeds.

Post a comment